Lesson 6: Fresh Herb Pasta
Guiding Rule: Break from tradition and streamline your pasta dough with the help of a food processor.
While I have made many pounds of fresh pasta dough in my lifetime, I must admit, I’ve never used a food processor to do it. I see the trick all over the internet—many people swear by the method and find it easier. Call me old school or stuck in my ways, but I’ve always preferred using a fork and my own hands to do the work. So when beginning my research for this herby dish, the straightforward directions to use a food processor were striking. And there wasn’t an alternative.
The herbs were the main ingredient in this recipe that benefitted from the precision of the food processor. Chopping the herbs finely and evenly helped incorporate them into the flour mixture. I gathered that attempting to make this dough by hand would yield a rather uneven, funky dough.
With a bit of angst at having to take my food processor out from storage, I gathered my ingredients and got to work.
Step 1: Gather the ingredients
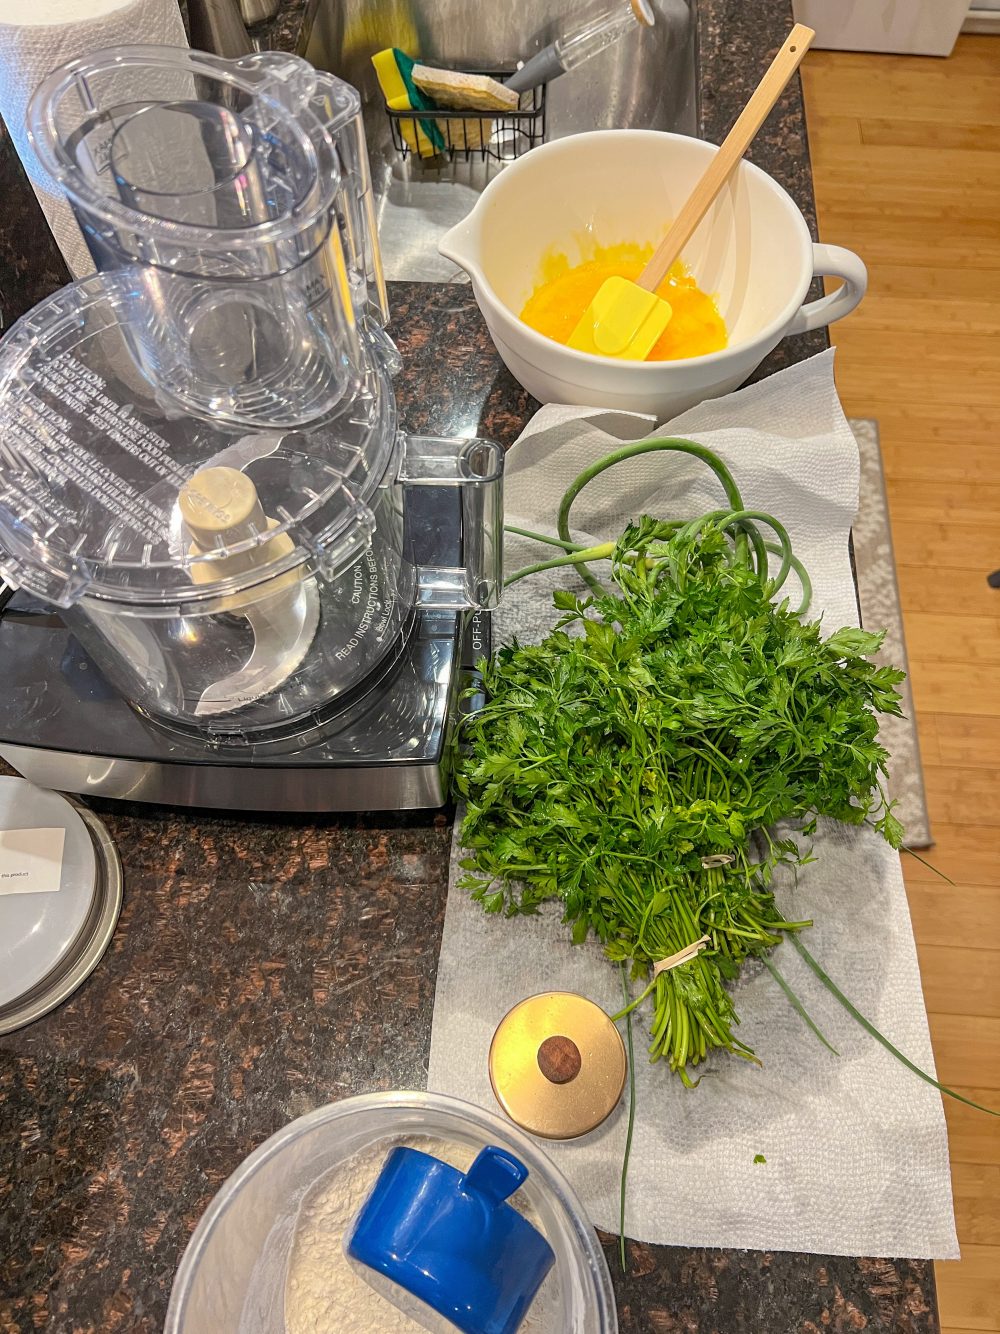
The beauty of pasta dough is in its simplicity. This recipe requires very few ingredients, and most you probably already have in your pantry. For my herbs, I chose what looked best at the farmer’s market, opting for a gorgeous bunch of parsley (instead of dill) and chives. I separated my egg yolks into a bowl, added one full egg and a bit of water and mixed that together until combined. Yes, this recipe does require a lot of yolks, and yes, there is a reason for that. All of that egg yolk helps produce an extra rich dough, which stands up beautifully to the bright, bitter herbs. (I used my extra egg whites to make S’mores Bars with Marshmallow Meringue).
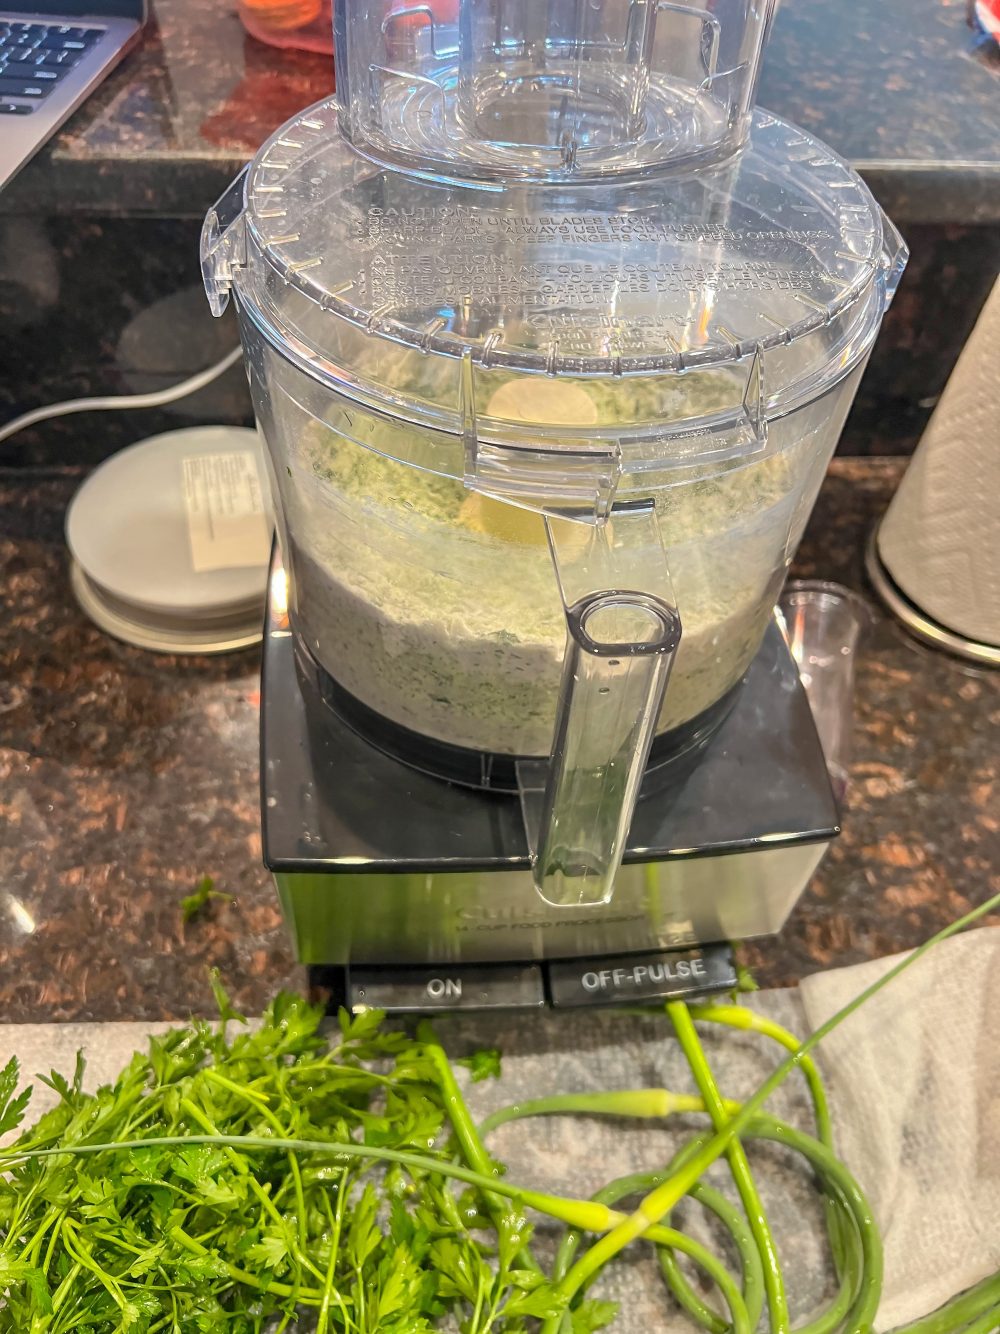
Step 2: Incorporate the herbs and flour
After rinsing the herbs, I packed the food processor full and added two cups of flour. I chopped them using a few quick pulses, then allowed the mixture to fully incorporate into a vibrant green powdery mixture. (Pro tip: No need to chop your herbs up before adding them to the food processor; it’ll do all that work for you).
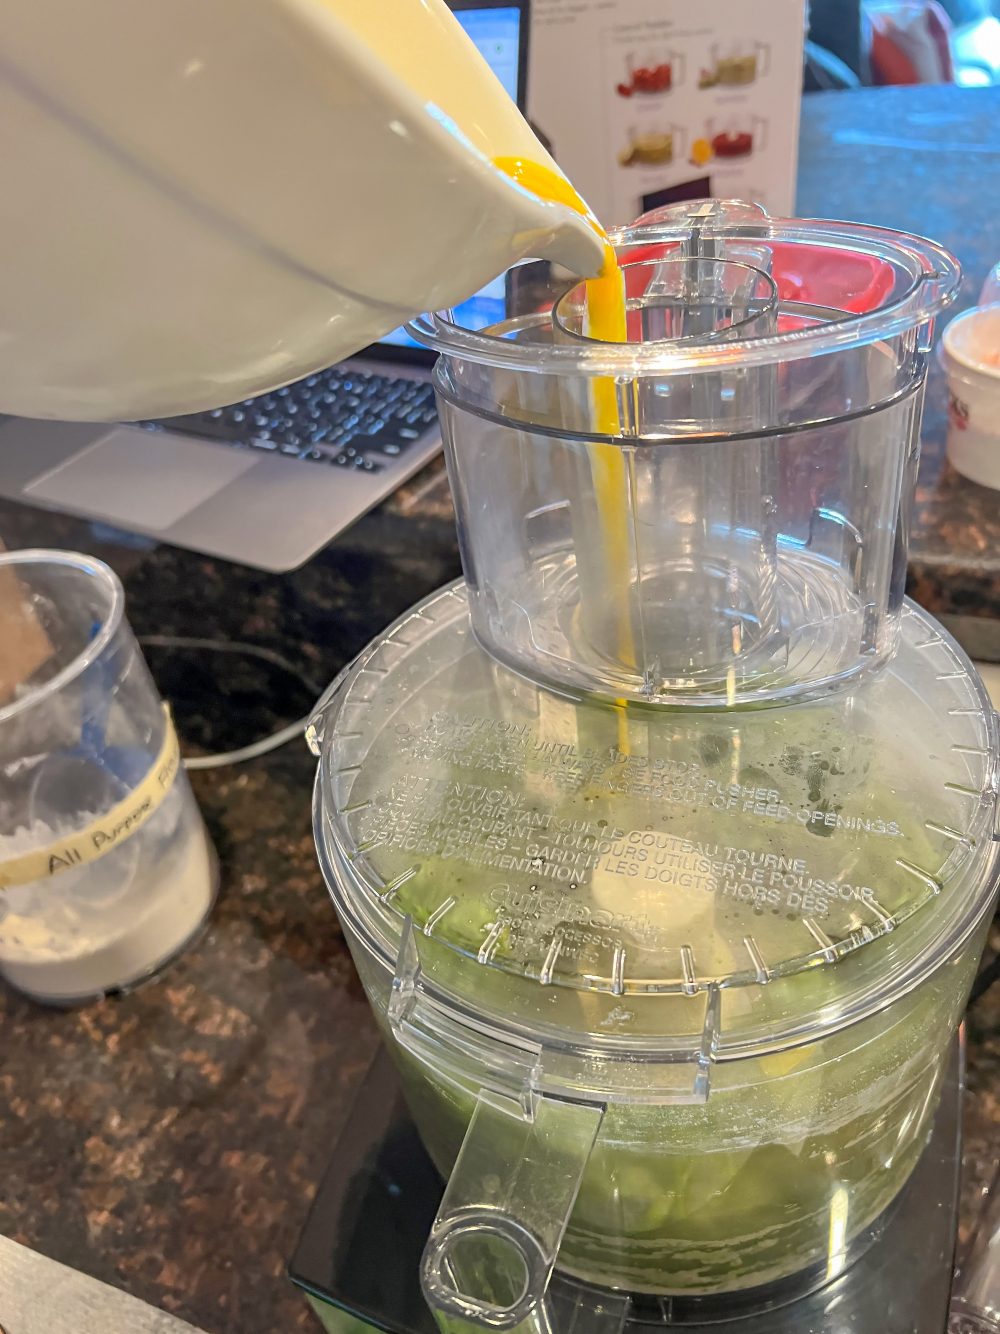
Step 3: Add the eggs
With the flour and herbs combined, I slowly started streaming in the egg mixture, letting the dough come together in large chunks. If your dough is on the drier side, add an extra teaspoon or two of water. After about two minutes, I turned my dough out onto a floured surface. Because it was on the wetter side, I didn’t add any extra water.
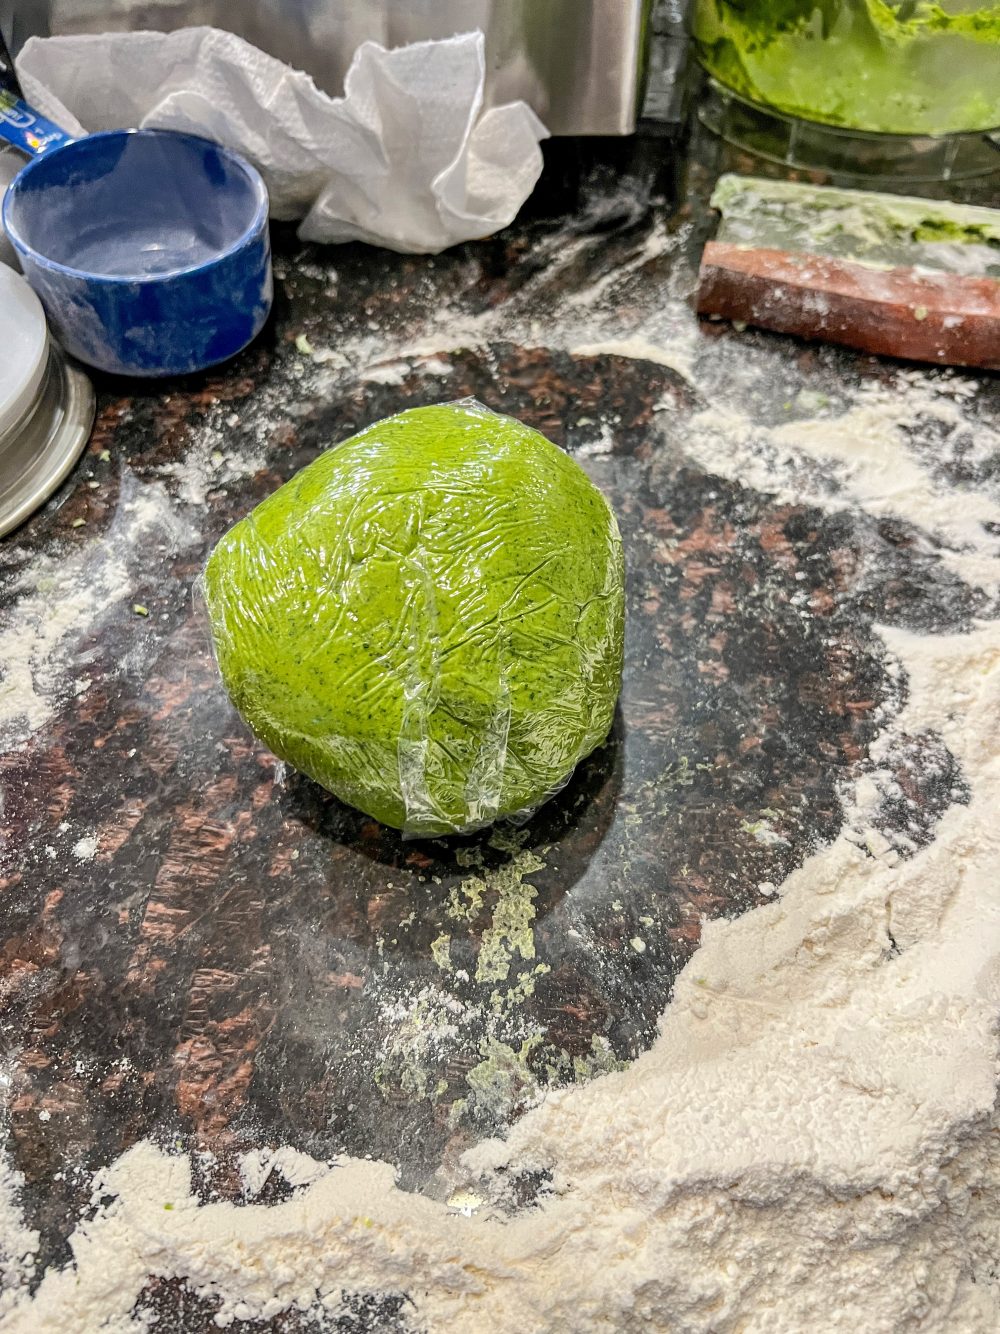
Step 4: Knead the dough
On a very floured counter, I began kneading the dough, adding extra flour in stickier spots. I kept kneading for about seven minutes, really working to activate the gluten in the dough until it was smooth and shiny. To test if it was done, I poked it with my finger—it should bounce back quickly. Wrapping it in plastic, I put my dough ball in the fridge to let it rest. If you are making pasta under a time crunch, you only need to let your dough rest under a kitchen towel at room temperature for an hour. If you’re waiting to roll out your dough, cover it in plastic and put it in the fridge for up to 24 hours.
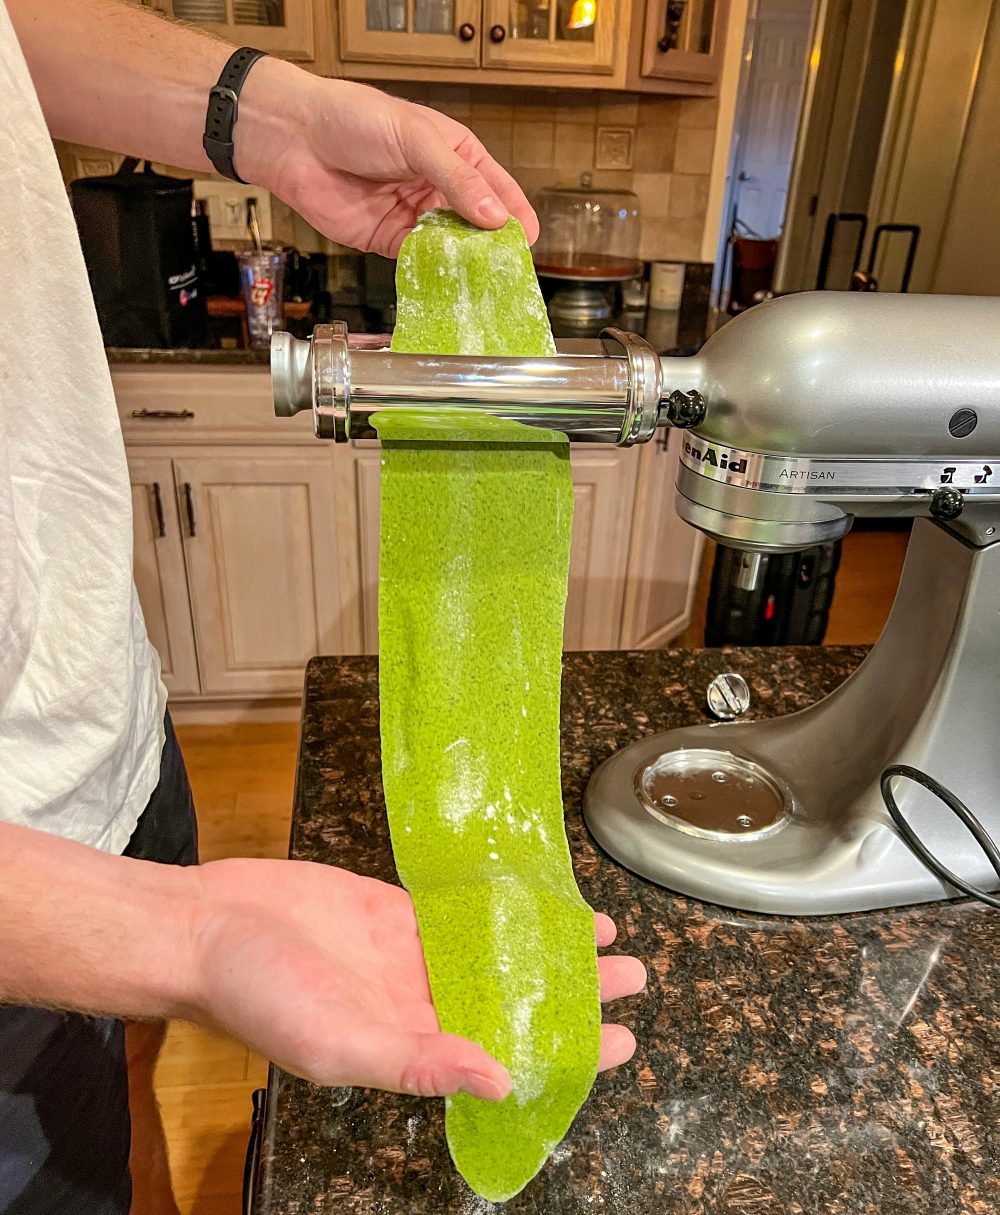
Step 5: Roll out and cut
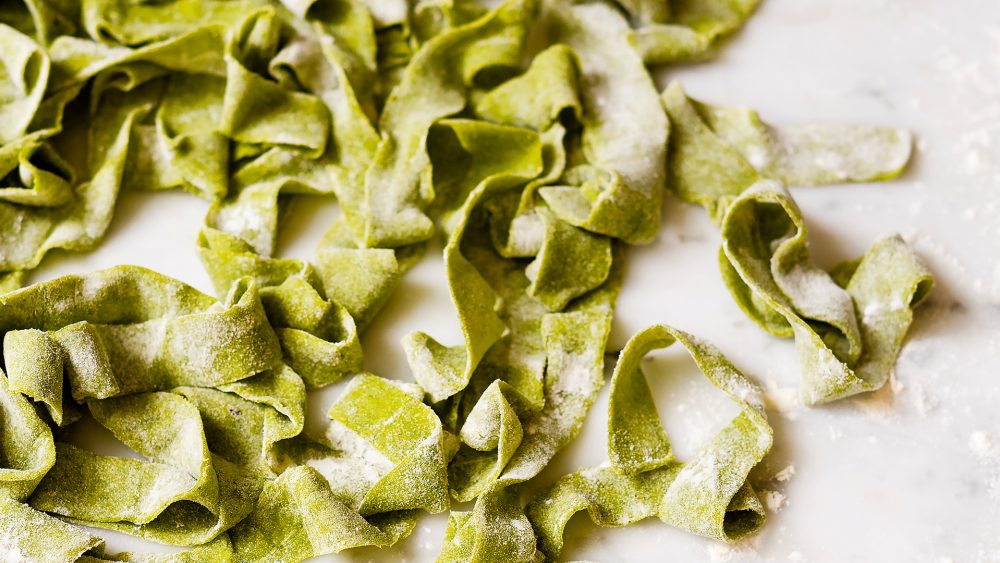
After resting, I unwrapped the dough and cut it into quarters, flouring my work surface and dusting the dough itself. Shaping one section into a rectangle and flattening it down, I put it through my pasta machine and rolled it out, adjusting the thickness setting on the machine after each pass. I stopped when it was about 1/16-inch thick, then floured the sheet, folded it into thirds and cut crosswise to make pappardelle, dusting each strand with a bit more flour. If you’re waiting to cook the noodles, flour and leave them at room temperature. Alternatively, you can flour them, cover with a kitchen towel and refrigerate for up to 12 hours.
Step 6: Cook and plate
With my salted water at a rolling boil, I added my pasta in batches, taking care to move the noodles around in the water to avoid sticking. About a minute is all it took to cook them to al dente. I served mine up super simply, adding a good glug of finishing olive oil, a pinch of salt and a sprinkling of red pepper flakes. It was the most vibrant bowl of pasta I’ve ever seen!
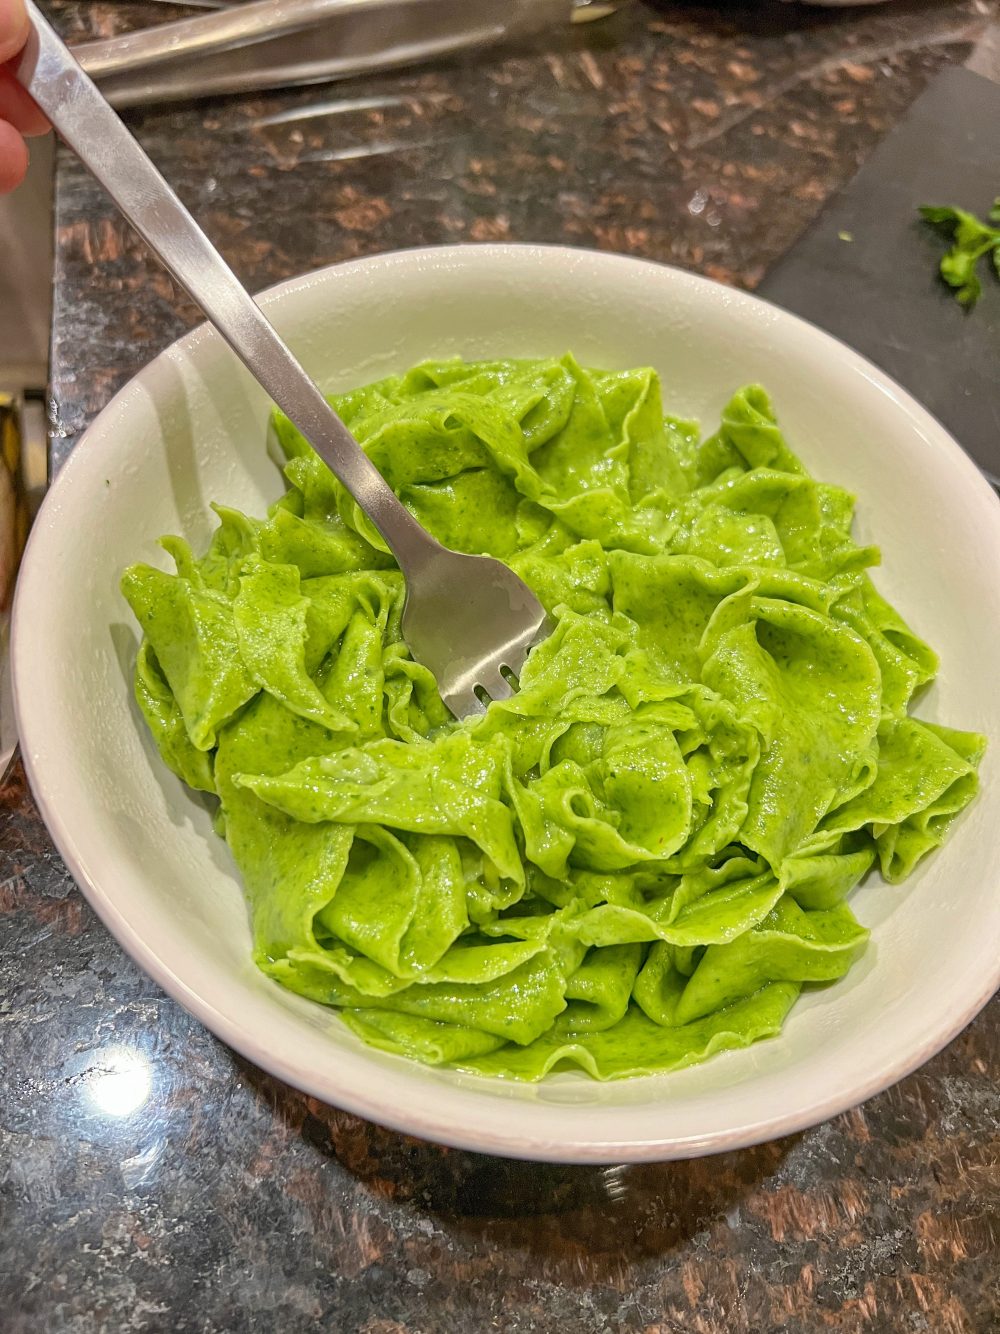
As for the flavor of these noodles? Wow. It was like summer in a bowl. Fresh, vegetal, light and so fragrant, these noodles were perfect, bite after bite. I loved the rustic, hand-cut texture, which made each noodle toothsome and easy to twirl. And I didn’t miss any sauce—a touch of good olive oil was all these bright green noodles required. My only regret? Not making a second batch so I could have leftovers that lasted more than a day.
Join the conversation on Facebook, Instagram, TikTok and Pinterest.
And if you're looking for more Milk Street, check out our livestream cooking classes with our favorite chefs, home cooks and friends for global recipes, cooking methods and more.